
The essential guide to Squarespace Courses & Digital Products

What is it?
Creating an online course has now become even easier with the new Digital Products from Squarespace. You now have the ability to create a Course, Video on Demand or Member Site within your Squarespace website.

So what’s the difference between the options?
Courses (Newest)
Sequential learning paths that have a structure and are ordered. These can take the form of video / text / images content. This allows for progress tracking, and also uses side navigation. You can monetise these behind a paywall or give them away for free in return for a sign up.
Video Library
Unordered content within a library that you can organise into relevant categories. Have your own little Netflix setup for example! This would work really nicely if you were offering workout routines that clients could use at their leisure.
Member Site
This is the new name for “Member Area”, which has the ability to be flexible, optional top navigation and you can put any content behind this plan.
Unpacking Courses
This is a collection that consists of two different structures.
Overview page
This shows what is within the course - allowing for a “Chapter” to hold a series of “Lessons”. This page is auto populated from the content that is published.
There is the ability to manually mark a lesson as completed. There is a progress bar which will fill up based on the percentage of content that is marked as completed.
Individual lessons page
The lesson page is made up of a number of parts.
You have the ability to add either video, text or image content to your lesson page
There is a floating Side Navigation to allow the user to jump between content, or manually mark/unmark as completed
There is a progression bar, which manually will update the percentage progress based on the users updates
If you use the naitive video block, this will then add a time span to each of the lessons, giving an indication of how long each one is.
There are Fluid Engine sections, to be able to add any additional content within this lesson
How to get started creating a Course?
Step 1 - Get Started
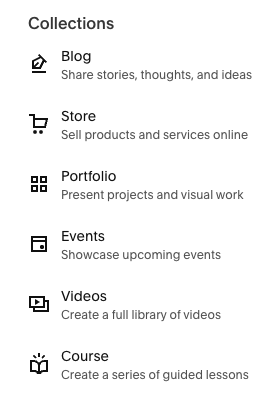
Within “Website” (formally known as Pages) you can select the “+” icon, which will display the picker.
Under the ‘Collections’, there will be a new “Course” option to select.
You can also locate the Course within the eCommerce section of the site, by selecting Selling > Products > Add Product > Course.

Step 2 - Add Course
You can then select a template for your course overview page. You are not making a permanent decision here in terms of the layout. As with any template, once selected you can customise and can change what you are seeing. This means the alignment of content, sizing of sections, spacing can all be adjusted to your own desires.

Step 3 - Course
This is where you will start to build your course, editing the “Course Overview” page, and adding material to your “Course Content”

Step 4 - Course Content
Within the course, you can add “Chapters” (Folders) and “Lessons” (Pages) to organise your content. You can drag to re-order content, move them between folders and so much more.
If you create a template Lesson for example, it can then be duplicated to help build out your Course Content.

Step 5 - Editing Course Content
Depending whether your content has video or not, this hero section can be turned on / off. Within the page itself, the Fluid Engine sections can be edited to add any blocks that you like.
Extra - Sales landing pages
You may want to create a sales landing page to sell this new course. There is a new block type called “Digital Product” which you can link your content to the specific ‘Pricing plan’ that you’ve setup. As mentioned, the course could be free or monetised and this will be shown to the user to Sign Up.

Key questions answered
-
From 21st August 2023 this will be available to all users.
-
This is available to “Business” plan users or higher.
-
Yes, there are Digital Product transaction fees for Courses, Memberships, and Video Sales. These are outlined on the Subscriptions page of your website.
-
Sort of! Squarespace will automatically going to create a Pricing Plan for every Member Area that exists today.
All current members will be migrated to that Pricing Plan.
So, what you can do is create a course, add the course to the Pricing Plan, and then remove the Member Area from the Pricing Plan. Because members are associated with the Pricing Plan, they will now all have access to the new course.
-
Presently you can only have two pricing options per pricing plan, but you can add one digital product to multiple pricing plans and thereby monetize a product in as many ways as you like.
-
Yes! Connecting a Summary Block at a Course Collection will display the Lessons.
-
The Order Confirmation page is not customizable for any type of order.
-
No, as with other collections, Course Collections cannot be duplicated.
You can however duplicate lessons within a course to help you build up a course.
-
As an example, a Members Site can include everything from another Member Sites, plus some more pages.
You can create two Member Sites: one with the base content, and one with the marginal content. Then, you can add “Member Site A” to one Pricing Plan, and both “Member Site A” and “Member Site B” to the second Pricing Plan.
In this way, purchasers of the first Pricing Plan will get access just to the base content, and purchasers of the second Pricing Plan will get both the base content and marginal content.
-
No, it’s unlimited
-
Currently, there are 30 mins of hosted storage included on all business and commerce plans.
There is additional storage and lower transaction fees available via the Digital Products Add-On.
You can use video via YouTube or Vimeo as an alternative, so you are not restricted to only using hosted video.
-
There will be more coming soon…
-
As an admin, you aren’t able to add a user manually to a course.
-
Yes, you can associate it with the new “Pricing Plan” that you are selling.
When selecting “Applies to”, choose ‘Digital Product’.
Need help?
We are Squarespace Experts, and can be hired to create the newly added Digital Products for you when it releases to all users.